Today we’re going to take a look at how we can use word templates to generate documents from Dynamics 365.
To start we need to download a blank template and the easiest way to do this is from the entity that you want to generate the document from.
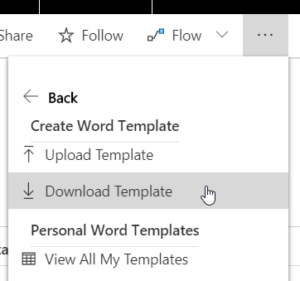
So let’s navigate to the contacts and on the command bar select “Word Templates” and then “Download Template”.
Now by default, the template that you download will allow you to merge in any data that is on the entity you downloaded the template from.
So in this example I would be able to merge in the contact’s first name and last name, because they are properties of the contact entity, but I wouldn’t be able to merge in the contact’s company address because that’s a property of the account entity that’s related to the contact, not a property of the contact itself.
The dialog that we see popping up when we download a template, allows us to select the entities related to the contact that we want to include in our template. So for example, I can select the account entity from the many to one relationships and this will allow me to merge in data from the account that is linked to the contact.
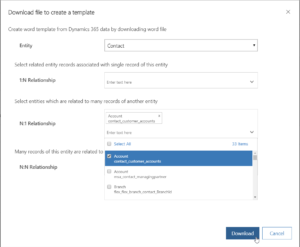
Now unfortunately, one of the limitations is that you are only able to select entities that are one step removed from the entity the template is downloaded from. So I wouldn’t be able to merge in a contact’s company’s cases, for example, into a template downloaded from a contact as it’s one step too far.
After we’ve defined the related entities that we want to include in our template we can click download and save the word template to our local hard drive, once there we can open up the file and enable editing.
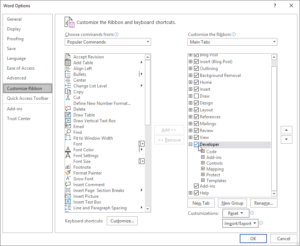
If this is the first time you have downloaded a template from Dynamics then you need to perform a little bit of setup in Word before you can start adding in the merge fields. Right click anywhere on the ribbon and select “Customize the Ribbon..” and then add a check box to “Developer” and click “OK”.
This will enable the developer ribbon and enable you to access the XML Mapping Pane, once you have the pane open change the Custom XML Part to the one that contains Microsoft CRM.
This will give you access to the properties of the entity that you downloaded the template from, to insert a property into your document, simply right click on the appropriate property, select Insert Content Control and then Plain Text.
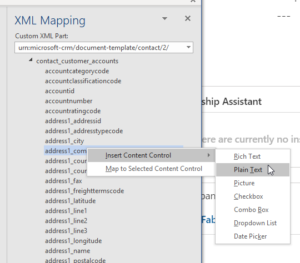
At the very bottom of the property list you will find the related entities that you selected when downloading the template, so as you can see I can now add the address of the contact’s company to my document.
Once you are happy with your document, save it and we can upload it back into Dynamics 365. Navigate back to your entity and select “Word Templates” from the command bar again, but this time select “Upload Template”.
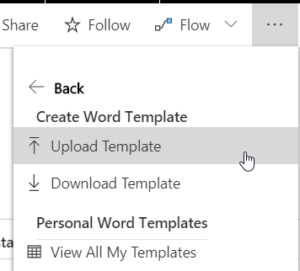
Browse to your saved template and click “Upload”.
You might want to rename your template at this point to something more descriptive, but once it’s uploaded, you can now generate your document from the same “Word Templates” menu you used before.
This time, select your template from the list and Dynamics 365 will merge the data from the selected record into your document which you can then save to your hard drive and do with as you wish.
